PCSX2 is one of the most popular and widely used PlayStation 2 emulators that allows players to enjoy PS2 games on their personal computers. One of the essential components required for running PCSX2 is the BIOS (Basic Input/Output System). Without the PS2 BIOS, the emulator cannot function, making it an integral part of the setup process. In this article, we will dive deep into understanding what the PCSX2 BIOS is, how to extract it legally, install it into PCSX2, and optimize its settings for the best gaming experience.
Whether you’re a newcomer to PCSX2 or an experienced user who needs a refresher, this guide will walk you through every important aspect of working with the PS2 BIOS on PCSX2.
What is PCSX2 BIOS?
The PCSX2 BIOS refers to the system file of the PlayStation 2 console that is required for the emulator to replicate the console’s behavior. BIOS is a crucial part of any gaming system as it helps to initialize the hardware, perform hardware checks, and manage interactions between the operating system and the console’s components. In the case of PCSX2, this BIOS allows your computer to simulate the PS2 environment, making it possible to run PS2 games.
Without the proper BIOS, PCSX2 cannot work correctly as it needs to interact with the internal components of the emulated PS2 system. The BIOS file essentially acts as the starting point for the emulator to run the game. It’s also responsible for the security of the system, managing the PS2’s boot-up process, and enabling game disc recognition.
It is important to note that PCSX2 cannot legally provide the BIOS due to copyright restrictions. Therefore, users must manually extract the BIOS from a PlayStation 2 console they own.
How to Obtain the PCSX2 BIOS?
As previously mentioned, PCSX2 does not come with the PS2 BIOS because it is copyrighted. To legally use the BIOS, you must extract it from your own PS2 console. Here is a detailed guide on how to legally obtain and extract the BIOS for PCSX2:
Step 1: Prepare the Necessary Tools
To extract the BIOS from your PlayStation 2, you will need the following:
- A PlayStation 2 Console: You need an actual PS2 to extract the BIOS.
- Memory Card: A standard PS2 memory card with sufficient space is required to install homebrew applications.
- Homebrew Software: Software like uLaunchELF or Free McBoot is needed to extract the BIOS. These tools allow you to run unsigned code on your PS2.
- USB Stick: A USB stick for transferring files between your PS2 and PC.
- A PC: A computer where you will store and manage the extracted BIOS file.
Step 2: Install Free McBoot or uLaunchELF
- Free McBoot: This is a softmod that allows you to run homebrew applications on a PS2. To install Free McBoot, you need to use a compatible memory card. You can install Free McBoot using a PS2 disc or by using an existing modded PS2.
- uLaunchELF: Another tool for accessing files and running homebrew applications. It allows you to navigate your PS2’s file system and access the BIOS dump utility.
Once you have either Free McBoot or uLaunchELF installed on your PS2, insert your USB stick into the PS2’s USB port.
Step 3: Extract the BIOS
- Once the homebrew tool is loaded, you can use the “BIOS dumper” tool to extract the BIOS from your PS2. The BIOS file will typically be saved on the USB stick in a folder.
- After the extraction, transfer the BIOS file to your PC for use with PCSX2.
Step 4: Legal Considerations
While extracting the BIOS from your own PS2 is legal if you own the console, distributing or downloading the BIOS from third-party sources is not legal due to copyright protection. Always make sure that the BIOS you are using comes from your personal PS2 console.
Installing the PCSX2 BIOS
Once you have successfully extracted the PS2 BIOS from your console, it’s time to install it into PCSX2. Here is how you can do that:
Step 1: Download PCSX2
If you haven’t already, download the PCSX2 emulator from the official website. The installation process is straightforward and available for Windows, Linux, and macOS. Choose the version compatible with your operating system.
Step 2: Locate the BIOS Folder in PCSX2
After installing PCSX2, open the program. On the first launch, the emulator will prompt you to select a BIOS file. To do this:
- Open the PCSX2 application.
- When prompted, select the directory where your BIOS file is stored. The default location for the BIOS file is usually C:\Program Files (x86)\PCSX2\bios (on Windows). However, you can select a custom folder if you prefer.
Step 3: Add the BIOS to PCSX2
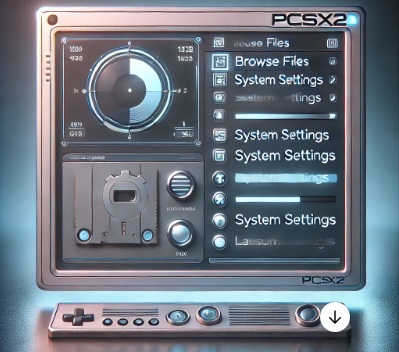
- In the PCSX2 settings, click on the “Config” menu at the top of the window.
- Select “BIOS” from the dropdown options.
- You will see a window prompting you to select your BIOS folder. Navigate to the folder where you stored your extracted BIOS.
- Select the appropriate BIOS file for your region (e.g., SCPH-39001 (USA) or SCPH-50000 (Japan)).
- Once selected, click OK to confirm your choice.
Now, the BIOS is successfully installed in PCSX2, and you are ready to run PlayStation 2 games.
Optimizing PCSX2 for Best Performance
While having the BIOS file set up is essential, optimizing PCSX2’s settings is also crucial for ensuring the best gaming experience. Here are a few tips to enhance your performance:
1. Graphics Settings
PCSX2 uses OpenGL or DirectX for graphics rendering. You can optimize these settings depending on your system’s capabilities:
- Go to the Config menu and select Video (GS) > Plugin Settings.
- Select OpenGL (Hardware) for the best performance, or Direct3D if you have an older PC.
2. Adjust Resolution and Enhancements
- For better graphics, you can upscale the internal resolution from the default 2x to 4x or 6x. However, higher resolutions require more powerful hardware.
- Enable or disable graphical enhancements such as Texture Filtering or Anti-Aliasing based on the performance of your PC.
3. Speedhacks
PCSX2 comes with a set of speedhacks that can improve performance, especially if your computer is not the most powerful. Access these settings through Config > Emulation Settings > Speedhacks.
4. Configure Audio Settings
Audio settings can be adjusted to ensure smooth sound quality while playing. Go to Config > Audio (SPU2) > Plugin Settings and experiment with different settings to find the optimal balance between sound quality and performance.
5. Controller Configuration
To configure your game controller, go to Config > Controllers (PAD) > Plugin Settings and map your keyboard or controller buttons accordingly. PCSX2 supports many popular controllers, including Xbox and PlayStation controllers.
Troubleshooting Common Issues with PCSX2 BIOS
Even after installing the correct BIOS and configuring the settings, you might face some issues while using PCSX2. Here are some common problems and solutions:
1. Game Not Loading or Freezing
- Ensure that the BIOS is correctly installed and matches the region of your game.
- Try updating your graphics drivers to the latest version.
- Adjust the video settings for better performance or disable speedhacks if the game is running too fast.
2. Audio or Video Sync Issues
- If you notice audio and video desynchronization, try tweaking the sound plugin settings.
- You can also enable Audio Synchronization settings under Config > Audio (SPU2) to fix sync problems.
3. Low Frame Rate
- Lower the internal resolution if the frame rate is too low.
- Reduce the number of speedhacks or use the Preset settings for different performance levels.
Conclusion
The PCSX2 BIOS is an essential component for running PlayStation 2 games on your computer. Extracting the BIOS from your own PS2 console and installing it correctly within the PCSX2 emulator is a relatively straightforward process. Once set up, optimizing the emulator’s settings can significantly improve the gaming experience.
PCSX2 provides users with the ability to relive classic PS2 games, and with the right BIOS and configuration, you can experience smooth, high-quality gameplay. Whether you’re revisiting your favorite childhood titles or exploring new ones, PCSX2 allows you to enjoy PS2 games in a way that was never possible before.